
iQOO Neo 9 Pro hard reset lets you fix glitches, Hang, bugs, Slowness, and Remove Password, Pin, and Pattern lock issues. So, If you want to know How to Hard Reset iQOO devices, Then the following instructions will help you to Factory Reset iQOO Neo 9 Pro to Wipe All the data and get back to the original Settings easily.
Factory Reset is the restoration process used to remove all personal data and restore the device to its original condition. Also, it fixes some small bugs, glitches, and slowness issues.
Make Sure, performing factory reset will erase all data and settings on the device, so before proceeding, it is crucial to take a backup of your important files or information. However, hard or factory reset will make the iQOO Phone like new and increase performance. Let’s start the process:
Read More: How to hard reset Vivo iQOO Z9
How to Hard Reset iQOO Neo 9 Pro – Recovery Mode
- Firstly, Power Off your iQOO Neo 9 Pro phone.

- After that, Press & Hold “Volume Up” key and “Power key” until Fastboot Mode appears.
- After that, Release all keys.
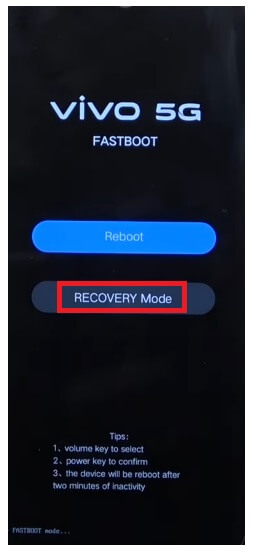
- Now select Recovery Mode using Volume Up & key.
- Then Press Power Key to Confirm Recovery Mode.
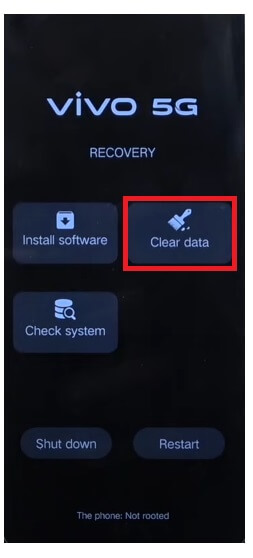
- Next, Tap on Clear Data.
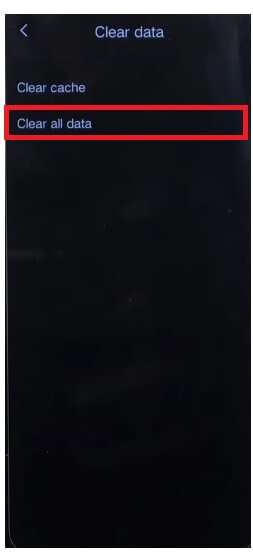
- Select Clear All Data.
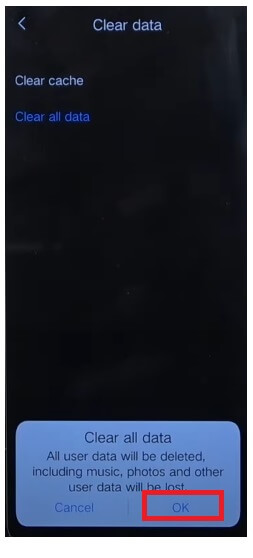
- Then Tap Ok.
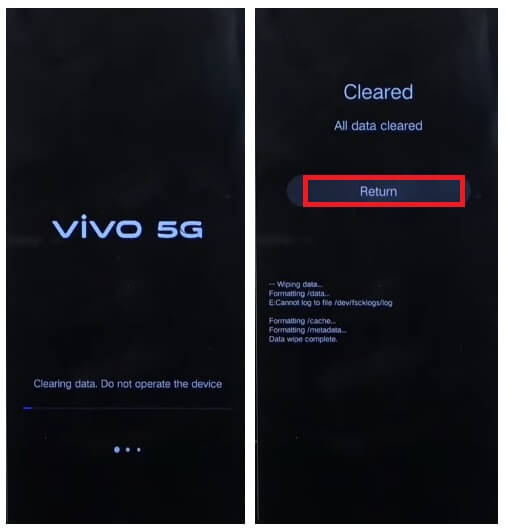
- Now the process will begun.
- Wait for finish.
- Once finished, Tap on Return to Back to Main Menu.
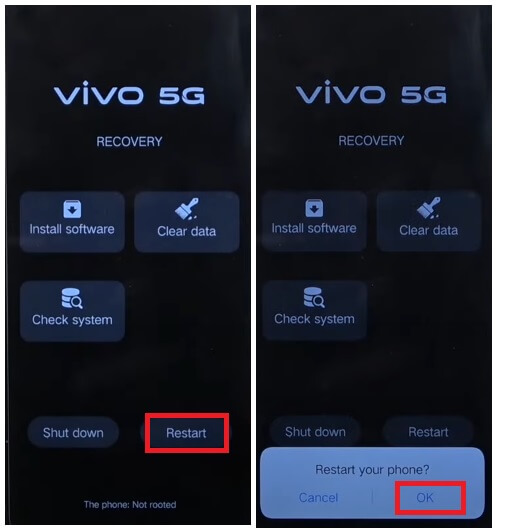
- After that, Tap on Restart => Ok.
- Wait for Power On.
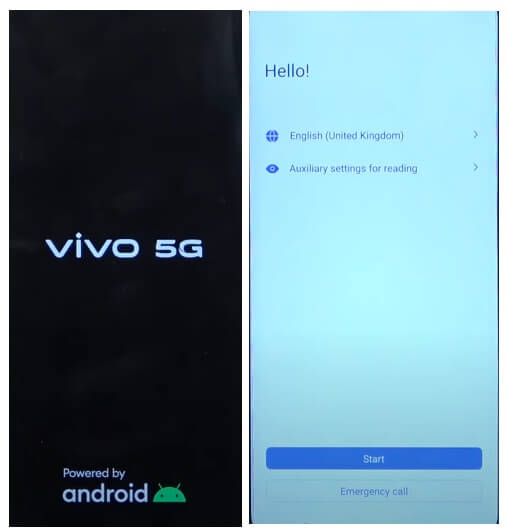
- Setup all Initial Steps.
- That’s it.
- You have successfully Wipe data & Reset your iQOO Neo 9 Pro Phone.
Note: After Perform Format data You will need to enter the previously used Google Credentials to skip the verification. In case, If you have forgotten the Gmail Credentials then the following tutorial will help you to iQOO Neo 9 Pro FRP Bypass Without PC.
How to Factory Reset iQOO Neo 9 Pro
- Firstly, Wake Up iQOO Neo 9 Pro Screen.
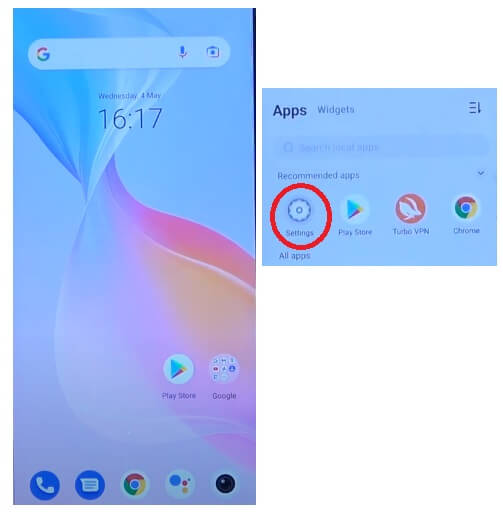
- Then Open the Device Settings.
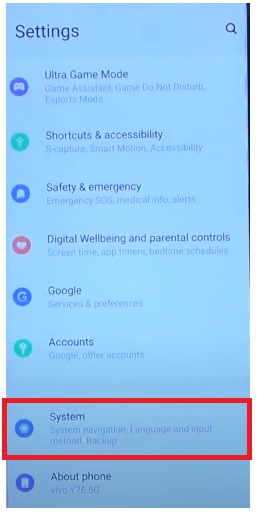
- Now Go down & select System.
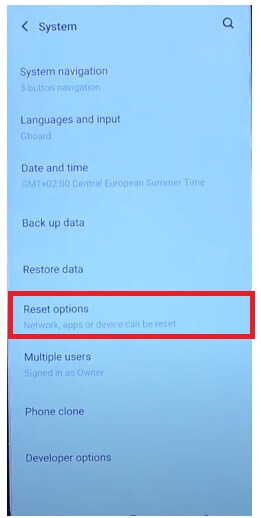
- Then Navigate to Reset options.
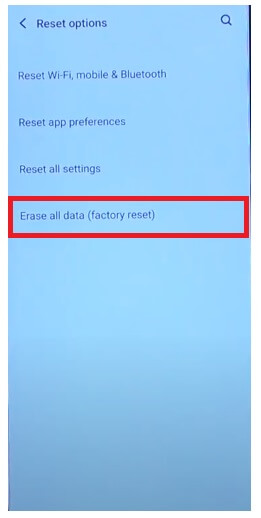
- After that, Select Erase all data (Factory Reset).
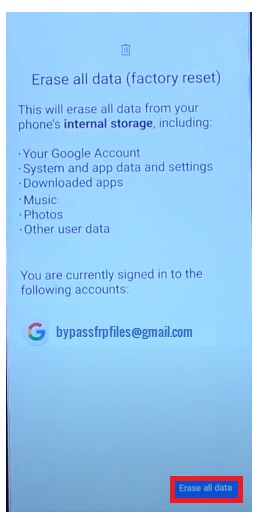
- Now tap on Erase All Data.
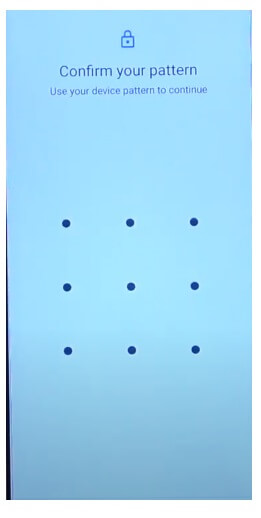
- Then draw the Pattern lock (Skip this if you haven’t enabled any screen lock on your phone).
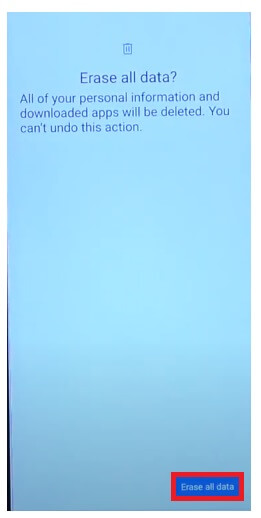
- Again Tap on Erase All Data.
- The factory reset process will begin.
- Wait for 3-4 minutes.
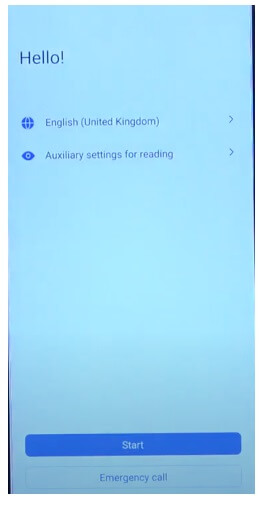
- Then the device will boot automatically.
- Setup all initial steps.
- That’s it.
Reset iQOO Neo 9 Pro With Google Find My Device
There is another option you can use to Reset your iQOO iQOO phone is to use Google Find My Device. With Find My Device you can remotely erase your data and reset the phone easily. The following procedure will help you to Reset iQOO Neo 9 Pro With Google Find My Device.
Please Note, You have to use your Google Account ID & Password to remotely reset the phone. Also, you can’t recover the data.
- First, you need a computer or a second phone.
- Then Open device browser & open the Google Find My Device website.
- Login with the same Google ID & Password used on iQOO Neo 9 Pro.
- Now there you can see the “3” different options.
- Play Sound, Secure device, Erase device.
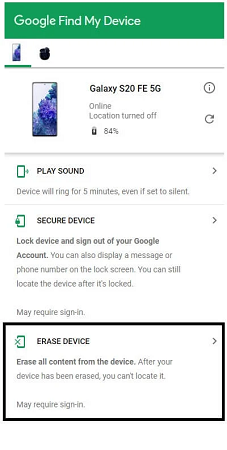
- Select Erase Device =>> Erase all data menu.
- Click Erase to Confirm.
- Then check on your iQOO Neo 9 Pro screen the procedure will start.
- Wait for finish.
- Once finished, disconnect & Powered On the phone.
- That’s it.
Check Also: Bypass Google FRP Verification on Vivo X Fold Plus [Without Computer]